
ECA Logo Version 11 

Slideshow
Header Slideshow
Add Me To Your Mailing List

Ensign Sailing Forum

Here goes nothing!!
Author Last Post
Here's the link to the Tiller Lock folks:
 
 
Ed
#1484 "Eraser"

In a message dated 9/7/2023 5:13:15 AM Pacific Daylight Time, ensignsailing@ensignclass.com writes:
 
View/reply online
Reply to forum at ensignsailing@ensignclass.com
If this message contains inappropriate content, you can report the message online
Best tiller lock I found is called Tiller Lock. Made in Canada. We installed one in each single handed boat set up. 
 
Zeke. 
 
Best tiller lock I found is called Tiller Lock. Made in Canada. We installed one in each single handed boat set up. 

Zeke. 

Robert-


I bought the X version, which is a little bit heavier and not much more money. The regular version seemed to be for smaller boats. I suspect that either will work.


The installation instructions are a little confusing. One suggested set up is to run the conrol line athwartships, perpendicular to the centerline, although the printed instructions are confusingly worded and that installation is not clearly illustrated. It also takes up a lot of space in the cockpit.


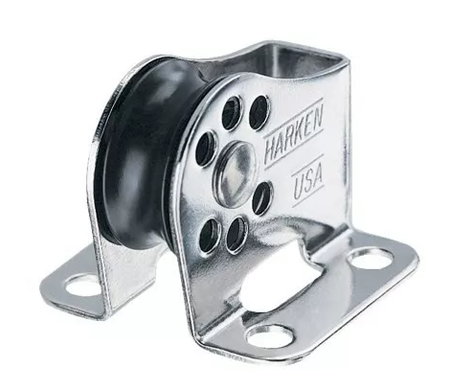
The recommended installation is to run the control line aft to corners of the cockpit. For boats like the Ensign with a rudder post visible in the cockpit, Wavefront recommends mounting a turning block level with the top of the rudder post. I did not want a block flopping back and forth on the cockpit wall, so I used fixed sheave Harken 243 microblock, with the bitter end of the control line secured by an angled horn cleat next to the helm station.A cam cleat would be perfect but I did not want to spend the money. Maybe next year.

I used the top of the rudder post as a guide for block placement and mounted the cleat so that the line stays level with the bottom horn of the cleat. By letting the rudder post and line level guide the installation, there was not a lot of measuring needed to keep the installation symetrical on each side of the boat.


I mounted each block two finger widths from the back wall of the cockpit, eyeballed the height from the rudder post and then let the bitter end of the control line tell me where the base of the cleat went. The only measurement was setting the angle of the second cleat so that it matched the first cleat that I installed. The whole project took less than 30 minutes working carefully.


The sheeting angle appears extreme with the tiller cocked up, but in use with the tiller down, this installation actually keeps the tiller from riding up. At the dock, I keep the raised tiller lashed to the backstay and relieve the tension significantly on the control line so that it doesn't chafe in the sheave..


Yes, the line run to the cockpit corner adds an obstacle to tending the outboard, but the control line is easily untensioned and lays flat. As I get used to living with this installation, I likely will uncleat the line on the motor side entirely when I need to climb onto the rear deck.


Stan Murphy

Nana 1658

Hartfield, Virginia

Hello Stan,
Do you use the TillerClutch or the TillerClutch X model?
Does the control line get in the way too much when you want to get to the outboard motor?

Thanks,
Robert Brandt
Lake Ray Hubbard, Dallas, TX
#261

Congratulations, Lyndsey. You are quite right abut the merits of this boat.


I regularly singlehand 1658 and have found a tiller clutch to be indispensible. My choice was a Wavefront, which works like a dream. Here is a link to their website.


Wavefront Tiller Clutch


It allows you to go forward to tend the halyards and reef line (at least in my set up) with both hands without having to juggle the tiller.


Here are a couple of photos of mine installed, albeit with the tiller kicked up for mooring at my dock.


I absolutely agree about roller furling unless you want to singlehand under the main only. My boat was a total refit and I didn't scrimp, so I used the smallest Harken Mark IV system. If you use a roller that has a foil, remember that you will have the added expense of removing the hanks and having a sailmaker sew in luff tape.


Not sure what motor mount you have, but unless you use a deck mounted fold down bracket (see photos), you will need to reinforce the transom for any outboard. My Suzuki 2.5 HP four stroke is light and pushes the boat just fine even into the wind with some opposing current and I was able to buy the motor new this spring for $750.00. You will need a long shaft motor.


You are correct that this is a safety issue, at least where I live on the Chesapeake. I would not trust just a trolling motor where I live although there are plenty of people who use them.


You can also see the bracket and motor in the background of my tiller clutch photos.


Good luck with your continuing restoration.


Stan Murphy

Nana 1658

Hartfield, Virginia

Great write up Lindsey. They are great boats for sure. 

I’d worry about the trolling motor, but I believe others might have more to say w more knowledge. I’m better with power above waterline knowledge. 

Doug 
740
(Quantum Sails ) 

Sent from Doug phone

Well, after an amazing first week of sailing Elysium I have a few thoughts:


  1. I have never been in an Ensign, but have other Alberg designed boats, and the Ensign has lived up to it's reputation. What an unbelievably amazing boat. It has exceeded all my expectations, and not one person that I had in her left unimpressed. She floats and tracks like a big boat, but has the maneuverability of a small one. We sail on Carter Lake with many Wake Boats, and the Enisgn just cuts through the wakes with an occasionally bow bob. - I just couldn't be more pleased with how she sails.
  2. I underestimated the toughness. Even though she still has some significant work to be done on the deck and brightwork, I grossly undervalued the build of this thing. She is solid, and as my buddy keeps telling me, she's all there. I should have never been nervous about sailing her in an incomplete condition. I will take this attitude into the off season as I work on her, reminding myself there is no need to over-engineer things and get wrapped up in the small details...because sailing her will be the primary goal.
  3. I believe I could sail her single handed right now, but don't know how I would feel about getting caught in a thunderstorm trying to get the hank-on genoa down on the the foredeck myself. So with this in mind I want to work on getting a furler system.
  4. Lastly, I have mixed feelings about the motor mount. I like it, but it still a pain to remove due to the tight fit. I'm currently using a large 24V trolling motor, but don't know if that is the smartest thing in the event I have to get back to the docks in a stiff headwind. I can go about 4 knots all out, with sails down in calm seas. That's not quite 90% of hull speed, which I believe I should be at for safety reasons.


In summary, the Ensign has been an excellent choice for me and my family. I can't wait to keep working and sailing her!!


Lindsey Beasley


If it's that old and brittle replace it. The track is an excellent surface to tape to when you paint the boat. 

Zeke


I am sure it will look great. My boat was the color of yours at the beginning of our restoration and Chad Lewis suggested grey. I agreed with him but I am sure the white will look great. White makes that color blue pop.


Stan Murphy

Nana

1658

Hartfield,, VA

"Question: Has anyone installed the new rubrails from ES and had to remove it? Is it a pain to do and not break the t-track? I wasn't going to install it for just a month a sailing since I will be doing the deck this winter."


The issue is not the rubrail, it's the T Track.


Based upon the original post, I am assuming that painting the deck would include painting the deck flange portion of the sheer clamp. Otherwise, deck paint will stop at the T track unless it is removed. Not installing the new rub rail until after the deck is painted makes more sense to me. It is certainly a neater job. As my other replies indicated, using new T Track is that way to go. The T track on my 45 year old Ensign was brittle and deteriorated when I removed the vinyl. Chunks of the track were also missing, apparently from an earlier rubrail replacement, which made parts of the rubrail non-uniform.


The only sensible thing was to replace the T track, which made a much neater installation. The job is going to consume the better part of a day. Better to spend that precious late season day sailing


Based upon Lindsey's reply last night, he is rightly thinking about installing and then removing new T track. If the track is riveted as Zeke reccommends, removing and re-installing it is a lot of work and results in more holes in the sheer clamp because the rack covers the flange, making attachment a blind proposition.


Why go to the trouble of installing new rack and rub rail for a month of sailing and then putting new holes in the boat or risking damage to a newly installed track by removing it?


Just my dos centavos.


Stan Murphy

Nana

1658

Hartfield, VA

Quoted Text

I was very pleased with this aspect of the project. Especially with the color of your boat, I think you will be happier with the grey rubrail material as opposed to white."


Thanks Stan for the feedback on the color. Unfortunately I ordered the rub rail at the beginning of the year and got white. I'm hoping that it connects with the boot stripe...we will see.


Lindsey

Zeke, so installing the track and vinyl now, then taking it off in a couple months won’t be an issue?


Lindsey 


Sent from Yahoo Mail for iPhone


The vinyl should just come off and snap back on. Track shouldn't be an issue 


Zeke


Here is a link to Zeke's video: Rubrail Video


One rubrail thread was started here on 7/1/23.


Re-reading your post, I would not install new rubrail and then take it off. Too much can wrong.


Stan Murphy

Nana

1658

Hartfield, VA

"Question: Has anyone installed the new rubrails from ES and had to remove it? Is it a pain to do and not break the t-track? I wasn't going to install it for just a month a sailing since I will be doing the deck this winter."


I am a little unclear about this question. If you are working with an old T track, I would avoid handling it as much as possible because the plastic gets brittle with age. I just replaced my rubrails as part of a complete restoration and used new T tracks and new vinyl. I reccommend going that route.


There is a great video about rubrail installation that Zeke did a number of years ago. I posted a link to it on this forum in July. The process is not hard if you work with another person, The key is preparing the sheer clamp and having a uniform attachment surface. In the video, Zeke demonstrates how to make and use a feeler gauge to achieve a uniform thickness on the sheer clamp.Just be sure to grind out the old fasteners.


Here is a photo of 1658 witht he rubrail installed on port and starboard. We found it easier to do the transom separately and cover the joint with the stainless steel corner brackets that are available from Ensign Spars


Second photo shows the finished installation. Zeke's video shows how to notch the T track and wrap the track around the stern quarters.


I was very pleased with this aspect of the project. Especially with the color of your boat, I think you will be happier with the grey rubrail material as opposed to white.


I bought the vinyl several years ago from Chad Lewis but we managed to overlook the T track. This spring, Bob Conkey expedited an order for the track. Great experience dealing with him.


Stan Murphy

Nana

1658

Hartfield, VA


Enjoy! And be sure to report back because I’m sure you’ll/she’ll survive!


Okay, I can't take it anymore and just launching 1343. I've gone a little faster than I wanted to on the topside and not faired it out as much as I'd like, but she has 2 coats of EzPoxy, a boot stripe, and some fresh Vivid bottom paint. I've had to replace the bow stem since the old one was separated and the the deck and hull had split. I removed the screws that were keeping the shear clamp together and reassembled via rivets. While I had the deck split from the hull at the bow, I epoxied in the nuts to the hull, making it easy to remove the bolts should I need to rebed. - I won't have the benches in right away, but figure we can just use some foldable camping chairs if we need to sit and sail. But my hope is that we will be ripping it across the lake and standing the whole time, haha.


Well, here goes nothing!!...and if she sinks, I've already told my wife I'm going down with her. So just in case, it was nice knowing you guys 😁


Question: Has anyone installed the new rubrails from ES and had to remove it? Is it a pain to do and not break the t-track? I wasn't going to install it for just a month a sailing since I will be doing the deck this winter.


-Lindsey Beasley

Return to Forum
Sponsor Number URL address
Sponsor 1 https://www.quantumsails.com/en/default
Sponsor 2 http://www.triadtrailers.com/
Sponsor 3 http://www.ussailing.org
Sponsor 4 http://www.northsails.com
Sponsor 5 http://www.spectrumphotofg.com
Sponsor 6 http://www.defender.com
Sponsor 7 http://www.ensignspars.com
Sponsor 9 http://www.patterson-marine.com
Sponsor 10 https://stores.crsapparel.com/ensign_class/shop/home
Sponsor 11 https://zbloksun.com/

ENSIGN CLASS Sponsors